Transforming Classroom Resources into High-Quality TPT Products: A 5-Step Guide
Jul 16, 2024
Don't reinvent the wheel when creating resources from your Teachers Pay Teachers store! Use what you already have created for your own classroom! To go from classroom resource to TPT products, you might just need to add a few things.
Picture this.
You've already created a lesson for your classes. Your students have not only enjoyed the lesson, but they have also learned the content from it. Yay! Since it has passed the test of your students in your classroom, you want to upload it to Teachers Pay Teachers to share with other teachers.
Remember, the goal for sharing your teaching resources is to make another teacher's life easier!
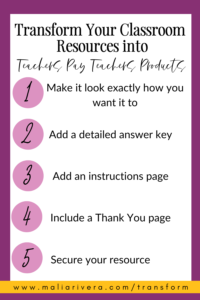
Let's transform your classroom resources into Teachers Pay Teachers products in just 5 steps.

1. Make the resource look exactly how you want it to be
For your students you may be giving them just a plain worksheet with some problems or questions on it. Think to yourself. Is this something I would be interested in buying? If the answer is no, then you may want to consider adding a few things.
First, give your resource one more check over to see if everything is spelled correctly, spaced appropriately, and the content covered is accurate. This is something you want to do to ensure your product is of high quality.
You might also want to consider adding borders and clipart or try out a different font. Adding physical features not only jazzes up the look of your resources, but helps make your resources unique to you. You can use free clip art and fonts from Teachers Pay Teachers. Just make sure to credit the author of the clip art or fonts in the credits page of your resource. Always give credit where credit is due!
2. Add a detailed answer key
To automatically increase value of your resource, you want to include an answer key. What will make this even better is if there is a detailed answer key. A detailed answer key is not just stating the answers for each question. The purpose of including a detailed answer key is to make your resource easier to use for the teacher buyer. You want to include reasoning, work shown, or anything else that will help the teacher when giving the resource to students.
3. Add an instructions page
The purpose of an instructions page is to help the buyer best understand how to use the resource you have created. If the buyer does not understand how to cut something or organize the activity, they are less likely to be pleased with your resource or buy from you in the future.
An instructions page can be instructions on how to set up the resource for students or how to implement the resource in a unique way. If you are sharing activities such as games or where students might need to cut or fold something, you are definitely going to want to include an instructions page for your teacher buyer.
4. Include a thank you page
Not only are you thanking your buyer, but you're also thanking the artists that you have used in the creation of your resource. You've got to give credit where credit is due! If you use specific clip art or fonts in your resource, you need to make sure that you follow the artists terms of use (TOU) and give them credit.
One thing that you want to make sure is on the thank you page is your email address. This allows your buyer to contact you if they have an issue with the resource, want to make any resource requests, or just want to thank you for creating the resource. Your thank you page is also a great place to tell your buyer where else they can connect with you. In my thank you pages I link my social media accounts (Instagram, Facebook, Pinterest), my Teachers Pay Teachers follow link, and my website.
5. Finally, secure your resource
After you have done everything above to transform your classroom resources into TPT products, you need to protect your own work and the work of any artists that you may have used. Believe it or not, there are buyers out there that may try to steal your work and resell it as their own. All they need to do is "lift" your material (borders, clip art, etc.) from your resource, post it on their own Teachers Pay Teachers page and call it theirs. Not cool! So here is how you can secure your resource.
The first way to ensure that no one takes our resource, is to put our copyright on it and make it YOUR intellectual property. All you need to do put the "( c )" in the lower right corner with your first and last name and the year. For example, I would put "(c) Malia Rivera, 2022" on a resource I made this year.
Next, you want to secure your resource is to make sure no one can copy or move any aspects of your resource. This is what other TPT sellers refer to as "securing the resource". There are three main ways you can secure your resource: Downloading each page as a .jpg file and re-uploading each page of the resource as a background image, use adobe pro to password secure your resource, or use a software called Flatpack to secure it.
Your classroom resource has now been transformed!
Do You Want a FREE List of Words & Phrases to Add to Your TPT Listings That Will Make Them Stand Out?
Join my email list and I'll send you my free Big List of Powerful Keywords and Phrases that teachers are ACTUALLY searching for. You can add these to titles, descriptions, thumbnails & more!
We hate SPAM & promise to never send it. Your contact information is safe and never shared.


