Design Your Own TPT Logo - Even if You're Not a Pro!
Jul 16, 2024Let's talk about creating a logo for your Teachers Pay Teachers store.
Aside from your store name, you are going to need a logo for Teachers Pay Teachers. This is how people are going to recognize you, your store, and your resources. So it is kind of important!
3 things you need to include in your Teachers Pay Teachers logo
-
A picture of you
Having your face as a part of your logo allows potential customers to put a face to your store and resources. Showing your face increases that know, like and trust factor with people looking through your store. It makes people think "Hey, that's Math with Ms. Rivera! I heard she created those Algebra 1 Pixel Art activities! I need to check these out." It makes people think that there is a real person behind your business.
-
Your store name
People don't only recognize you by a photo of yourself, but also by your name. You can certainly use your real name or a part of it. For example, I used my last name for my store name. Some people only use their first and last name. You can also help people in your niche by including the grade(s) or subject(s) you make resources for. For similar reasons, it increases people being able to recognize you and your resources.
I would stay away from really long store names. You want it to be easy to say and roll off the tongue!
-
Your brand colors
These colors help people think of you when they see your resources or your store. Think about other brands. You know that CocaCola is red, white and black. Someone may see those colors together and think about drinking a Coke! You want people to see your brand colors and think about your amazing teaching resources.
A great way to include your brand colors in your logo is to wear an outfit that includes your brand color (s) or write your store name in your brand colors.
Now that you know what you need to create your teachers pay teachers logo, let's actually make one!
How to make your Teachers Pay Teachers logo in PowerPoint
Step 1: Open a PowerPoint presentation
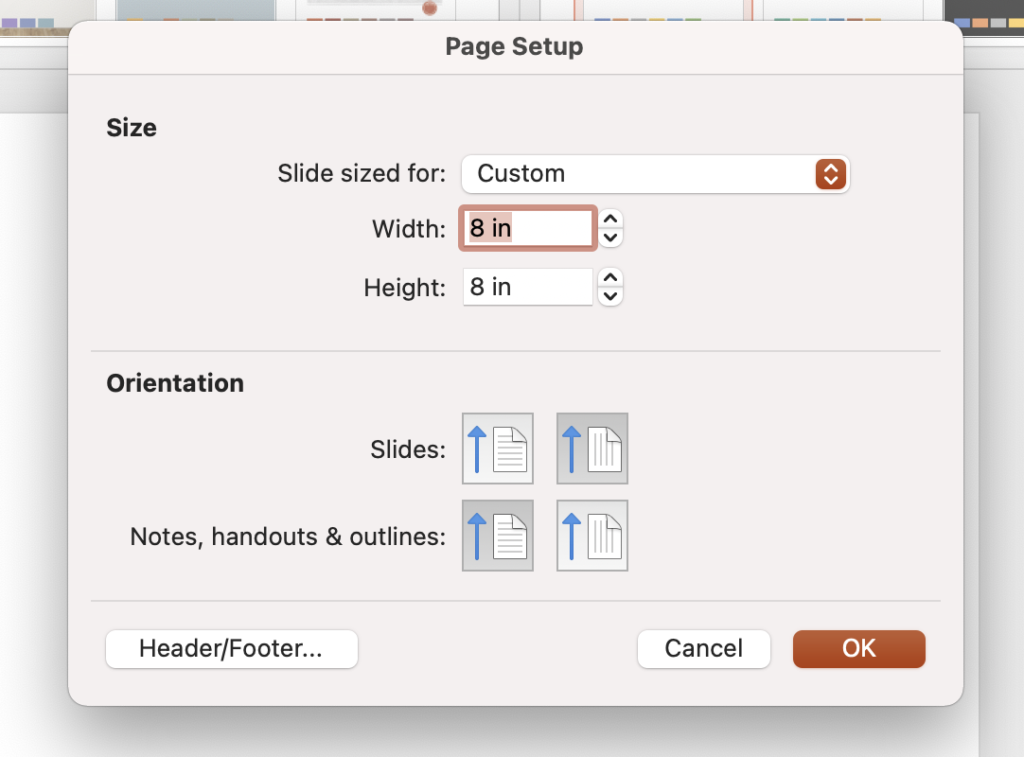
Once you open a new presentation, you will want to resize it to be a square. I recommend resizing it to 8 inches by 8 inches. You can make it larger if you wish, but this is the size I typically use.
To resize your slide, go to the Design tab, select Slide Size, select Page Setup. Make sure your slide is set up for "custom" and then you can choose your dimensions.
Step 2: Insert your photo
We want a clean slate for our slide. So, we are going to want to remove the text boxes that are already on the page. You could click on each text box and delete them, but here is a time saving tip! If you want to delete everything off the page, on your keyboard hold down "ctr" and "a" at the same time. This will select all elements on the slide. Next, you press delete and everything will be deleted! Awesome trick, I know!
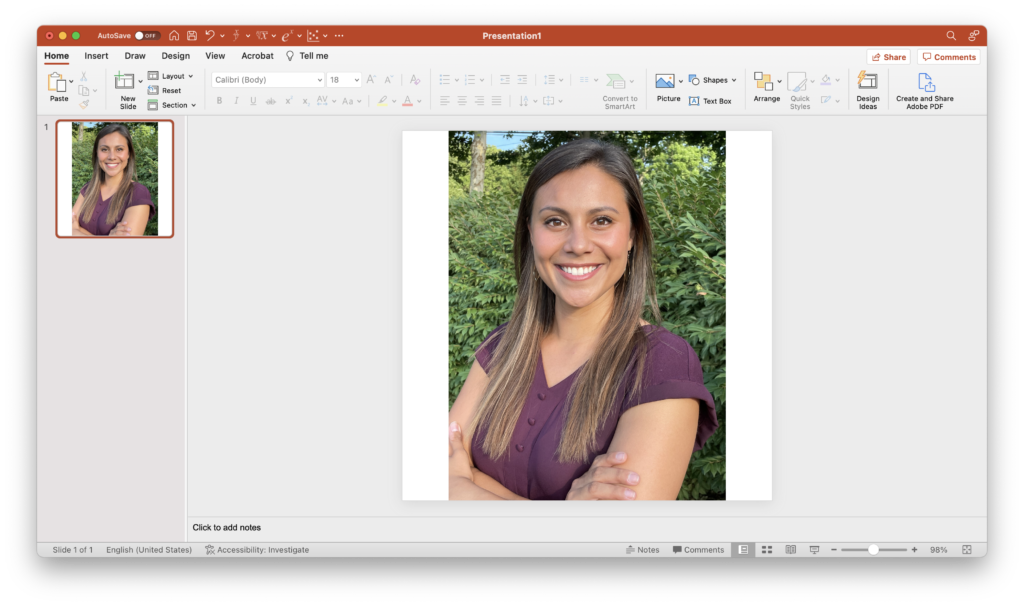
Now you can insert your photo to the slide. It is okay if your photo is not a perfect square or fit the page! We will adjust it everything in the next step.
Step 3: Crop to shape
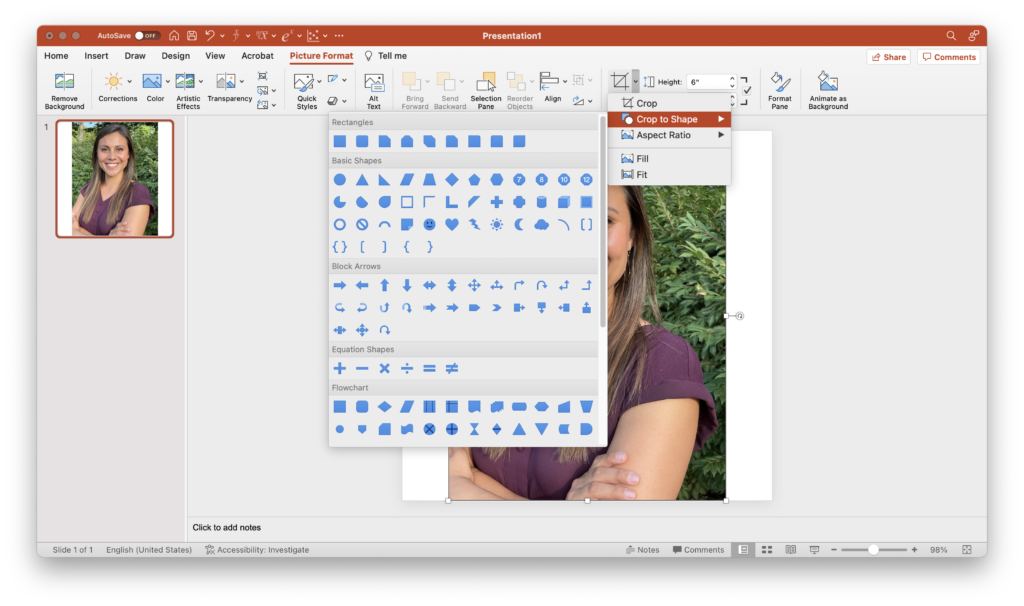
All logos on Teachers Pay Teachers are circular. So we need to make our picture into a circle. To do this we are going to crop the picture to be a circle.
To do this, make sure the photo is selected and you click on Picture Format at the top. Next you are going to select the down arrow next to Crop. If you just select Crop it will think you just want to crop the image rectangularly since that is mostly the shape of the original photo. Select Crop to Shape and select the circle.
If your photo is a rectangular, you may not get a circle. Instead, an oval. We don't want this! Select the down arrow again next to Crop and click on Aspect Ratio. You want it to be a 1:1 square aspect ratio so it will fit in a circle, not oval.
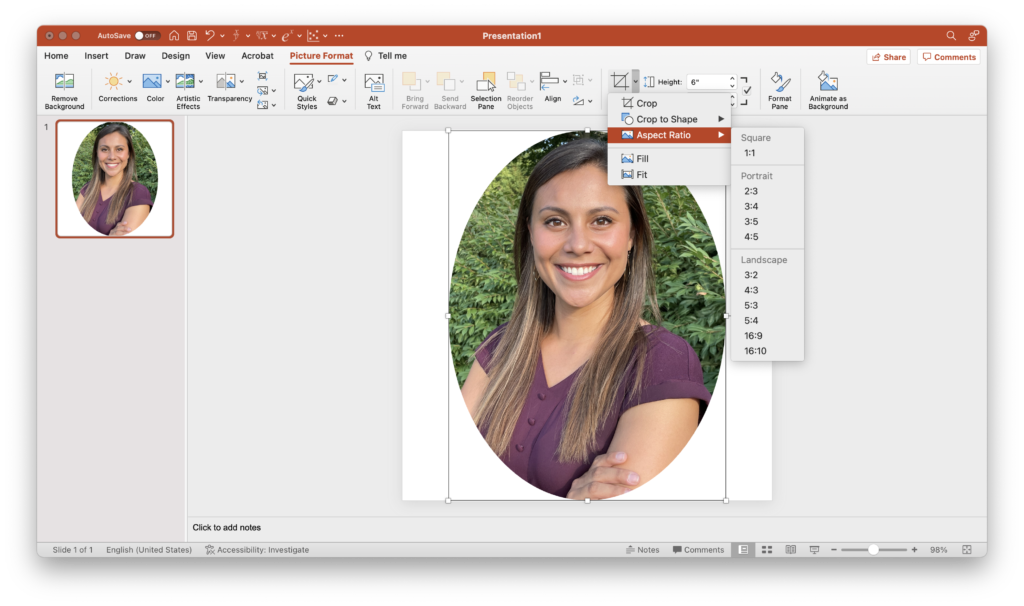
If your image is a little off, you can always select the Crop button and move or change the size of the photo to fit how you'd like in the circle.
Step 4: Add your store name and make it your own!
Now it is time to personalize it to fit your style! This part takes the longest...
You are going to want to use a text box to write out your store name. You can have multiple text boxes to do this. The two main things you want to focus on in this step is the size of font you are using for your store name and how you are making it stand out. Ultimately, you make it however you want!
This is also the time you can add other graphics or clip art that represent your niche. For example, I sell math resources in my store. So I would probably use a calculator.
Step 5: Save your Teachers Pay Teachers logo
All you need to do next is save your logo as a png file! The png file will allow the background to be transparent so you only see the circular logo. If you were to save your slide as a jpg file, it will save your logo and the white square background behind it.
There you have it, you are all set to upload your logo to your Teachers Pay Teachers store! Don't forget to use it on all your resources and resource elements!
If this seems like a lot or you don't think that you have the graphic design abilities, you can certainly hire someone to do it for you! Here are a couple people that definitely can create your Teachers Pay Teachers logo! Send them a DM (direct message) in Instagram if you are interested.
Caleigh from @thedenniscrew on Instagram
Jeralyn from @middleschoolkydd on Instagram
Do You Want a FREE List of Words & Phrases to Add to Your TPT Listings That Will Make Them Stand Out?
Join my email list and I'll send you my free Big List of Powerful Keywords and Phrases that teachers are ACTUALLY searching for. You can add these to titles, descriptions, thumbnails & more!
We hate SPAM & promise to never send it. Your contact information is safe and never shared.
TPT for Beginners Coach

